How to convert a color image into Red Green Blue image
Image Processing Project
In this project we will learn to convert a color image into red, green and blue image respectively using Java programming language. We will be discussing about how to convert the color image into green image in this project. The conversion to red and blue image is almost the same and you can implement that using the technique shown here.
Prerequisite
It is assumed that you have completed the projects titled How to read and write image file in Java and How to get and set pixel value in Java before starting this project.
Color image to Green image
Converting a color image into green image is very simple. All we have to do is repeat 3 simple steps for each pixels of the image.
- Get the G value of the pixel.
- Set the R and B value to zero.
- Save the new RGB value in the pixel.
Note! As we are converting the color image into Green image hence we are only focusing on the Green component value. When converting the color image to Red image we will consider the Red component. And for blue image we will only consider the Blue component.
Example:
Consider a color pixel with the following values
A = 255
R = 100
G = 150
B = 200
Where A, R, G and B represents the Alpha, Red, Green and Blue value of the pixel.
Remember! ARGB will have an integer value in the range 0 to 255.
So, to convert the color pixel into green pixel we will set R and B to zero.
So, the new pixel value will be
A = 255
R = 0
G = 150
B = 0
Note! We don't have to change the alpha value because it only controls the transparency of the pixel.
Import the required classes
Create a new file and save it by the name GreenImage.java. Open the file and import the following:
import java.io.File;import java.io.IOException;import java.awt.image.BufferedImage;import javax.imageio.ImageIO;
This part is same as How to convert a color image into grayscale image in Java and How to convert a color image into sepia image.
Create the class
Next we will create the class by the name GreenImage and inside the class we will have the main() method. For this we will write:
public class GreenImage{public static void main(String args[])throws IOException{
// some code goes here...
}//main() ends here
}//class ends here
Variables
Inside the main() method we create a BufferedImage variable img and a File variable f and set both of them to null. The img variable will hold the image file while the f variable will hold the image file path.
BufferedImage img = null;File f = null;
Read the image file
For this project we will read the color image sonam.jpg and it is inside the Image folder which is inside D: drive on a Windows PC. So, we will first create an object of File class and pass as parameter the image file path. And then we will read the image file by calling the read() method of ImageIO class. So, our code will look something like the following:
//read imagetry{f = new File("D:\\Image\\sonam.jpg");img = ImageIO.read(f);}catch(IOException e){System.out.println(e);}
Get image dimensions
Now that we have the image stored in the img variable, it's time for us to find the dimensions of the image. For this we will create two integer variable width and height and use the getWidth() andgetHeight() method to get the width and height of the image respectively. So, we will write the following lines.
//get image width and heightint width = img.getWidth();int height = img.getHeight();
Green Image code
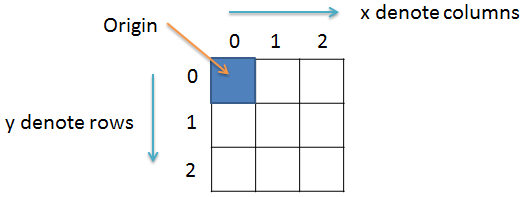
We know that an image is made up of pixels which we can represent in 2D co-ordinate. So, we will create two variables x and y and use two for loops to traverse each pixels.
For this we will write:
for(int y = 0; y < height; y++){for(int x = 0; x < width; x++){
// some code goes here...
}
}
Get pixel value and extract ARGB value
Inside the for loop we will first get the value of the pixel at co-ordinate (x,y) using thegetRGB(x,y) method. Then we will extract the Alpha and Green value from the pixel value. For this purpose we will create 3 integer variables p, a, and g to hold the pixel, alpha, and green value respectively.
int p = img.getRGB(x,y);int a = (p>>24)&0xff;int g = (p>>8)&0xff;
Set new pixel value
To convert a color image into Green image we have to set the Rad and Blue value of the pixel to zero. So, we will now find the new pixel value and set it to the pixel at co-ordinate (x,y). For this we will write:
p = (a<<24) | (0<<16) | (g<<8) | 0;img.setRGB(x, y, p);
Write image
After the for loop ends we will write the image file. For this we will write the following code:
try{f = new File("D:\\Image\\Output.jpg");ImageIO.write(img, "jpg", f);}catch(IOException e){System.out.println(e);}
Final code
/*** File: GreenImage.java** Description:* Convert color image to green image.** @author Yusuf Shakeel* Date: 27-01-2014 mon** www.github.com/yusufshakeel/Java-Image-Processing-Project*/
import java.io.File;import java.io.IOException;import java.awt.image.BufferedImage;import javax.imageio.ImageIO;
public class GreenImage{public static void main(String args[])throws IOException{BufferedImage img = null;File f = null;//read imagetry{f = new File("D:\\Image\\sonam.jpg");img = ImageIO.read(f);}catch(IOException e){System.out.println(e);}//get width and heightint width = img.getWidth();int height = img.getHeight();//convert to green imagefor(int y = 0; y < height; y++){for(int x = 0; x < width; x++){int p = img.getRGB(x,y);int a = (p>>24)&0xff;int g = (p>>8)&0xff;//set new RGBp = (a<<24) | (0<<16) | (g<<8) | 0;img.setRGB(x, y, p);}}//write imagetry{f = new File("D:\\Image\\output.jpg");ImageIO.write(img, "jpg", f);}catch(IOException e){System.out.println(e);}}//main() ends here}//class ends here
ADVERTISEMENT