
Todo Laravel Project - Laravel Tinker
Laravel Project
In this Laravel project tutorial we will learn to use Tinker to interact with database table.
In the previous tutorial Todo Laravel Project - Model we created a model to work with the todos table. Feel free to check that out.
Things we will learn
We are going to cover the following points.
- Learn how to use Tinker
- Mass assignment
- Insert data into todos table
- Fetch data from todos table
- Update data of todos table
- Delete data from todos table
Alright, let's get started.
What is Tinker?
Laravel includes a powerful REPL (Read-Eval-Print-Loop) called Tinker that helps us to interact with the Laravel application from the terminal.
To start Tinker run the following command in the terminal.
$ php artisan tinker
You will get to see a similar output on your screen.
$ php artisan tinker
Psy Shell v0.9.6 (PHP 7.1.13 — cli) by Justin Hileman
>>>
So, we get the >>> prompt with a blinking cursor waiting for us to enter some command.
Tinker with Todo model
In the following examples we will be using Tinker to interact with the todos table via the Todo model.
Use Todo model
Run the following command to use Todo model class.
>>> use App\Todo;
Check the total number of records
Run the following command in the terminal and it will tell us the total number of records in the todos table.
>>> Todo::count();
=> 0
At the moment we have 0 records.
Fetch all the entries
To fetch all the entries in the todos table we use the all() method.
Run the following command to fetch all entries.
>>> Todo::all();
=> Illuminate\Database\Eloquent\Collection {#2851
     all: [],
   }
Since, there is no entry in the table so we get back an empty array.
Insert data into the table
To insert data into the todos table we take help of the Todo model.
Create an object of the Todo class and pass the columns and values as an array.
Run the following command in Tinker.
>>> $todo = new Todo(['title' => 'first work', 'description' => 'some work to be done']);
We will get the following error.
Illuminate/Database/Eloquent/MassAssignmentException with message 'Add [title] to fillable property to allow mass assignment on [App/Todo].'
By default, Laravel will not allow mass assignment i.e. we can't set multiple columns.
To override this behaviour we have to make 'title' and 'description' as mass assignable.
Mass assignment
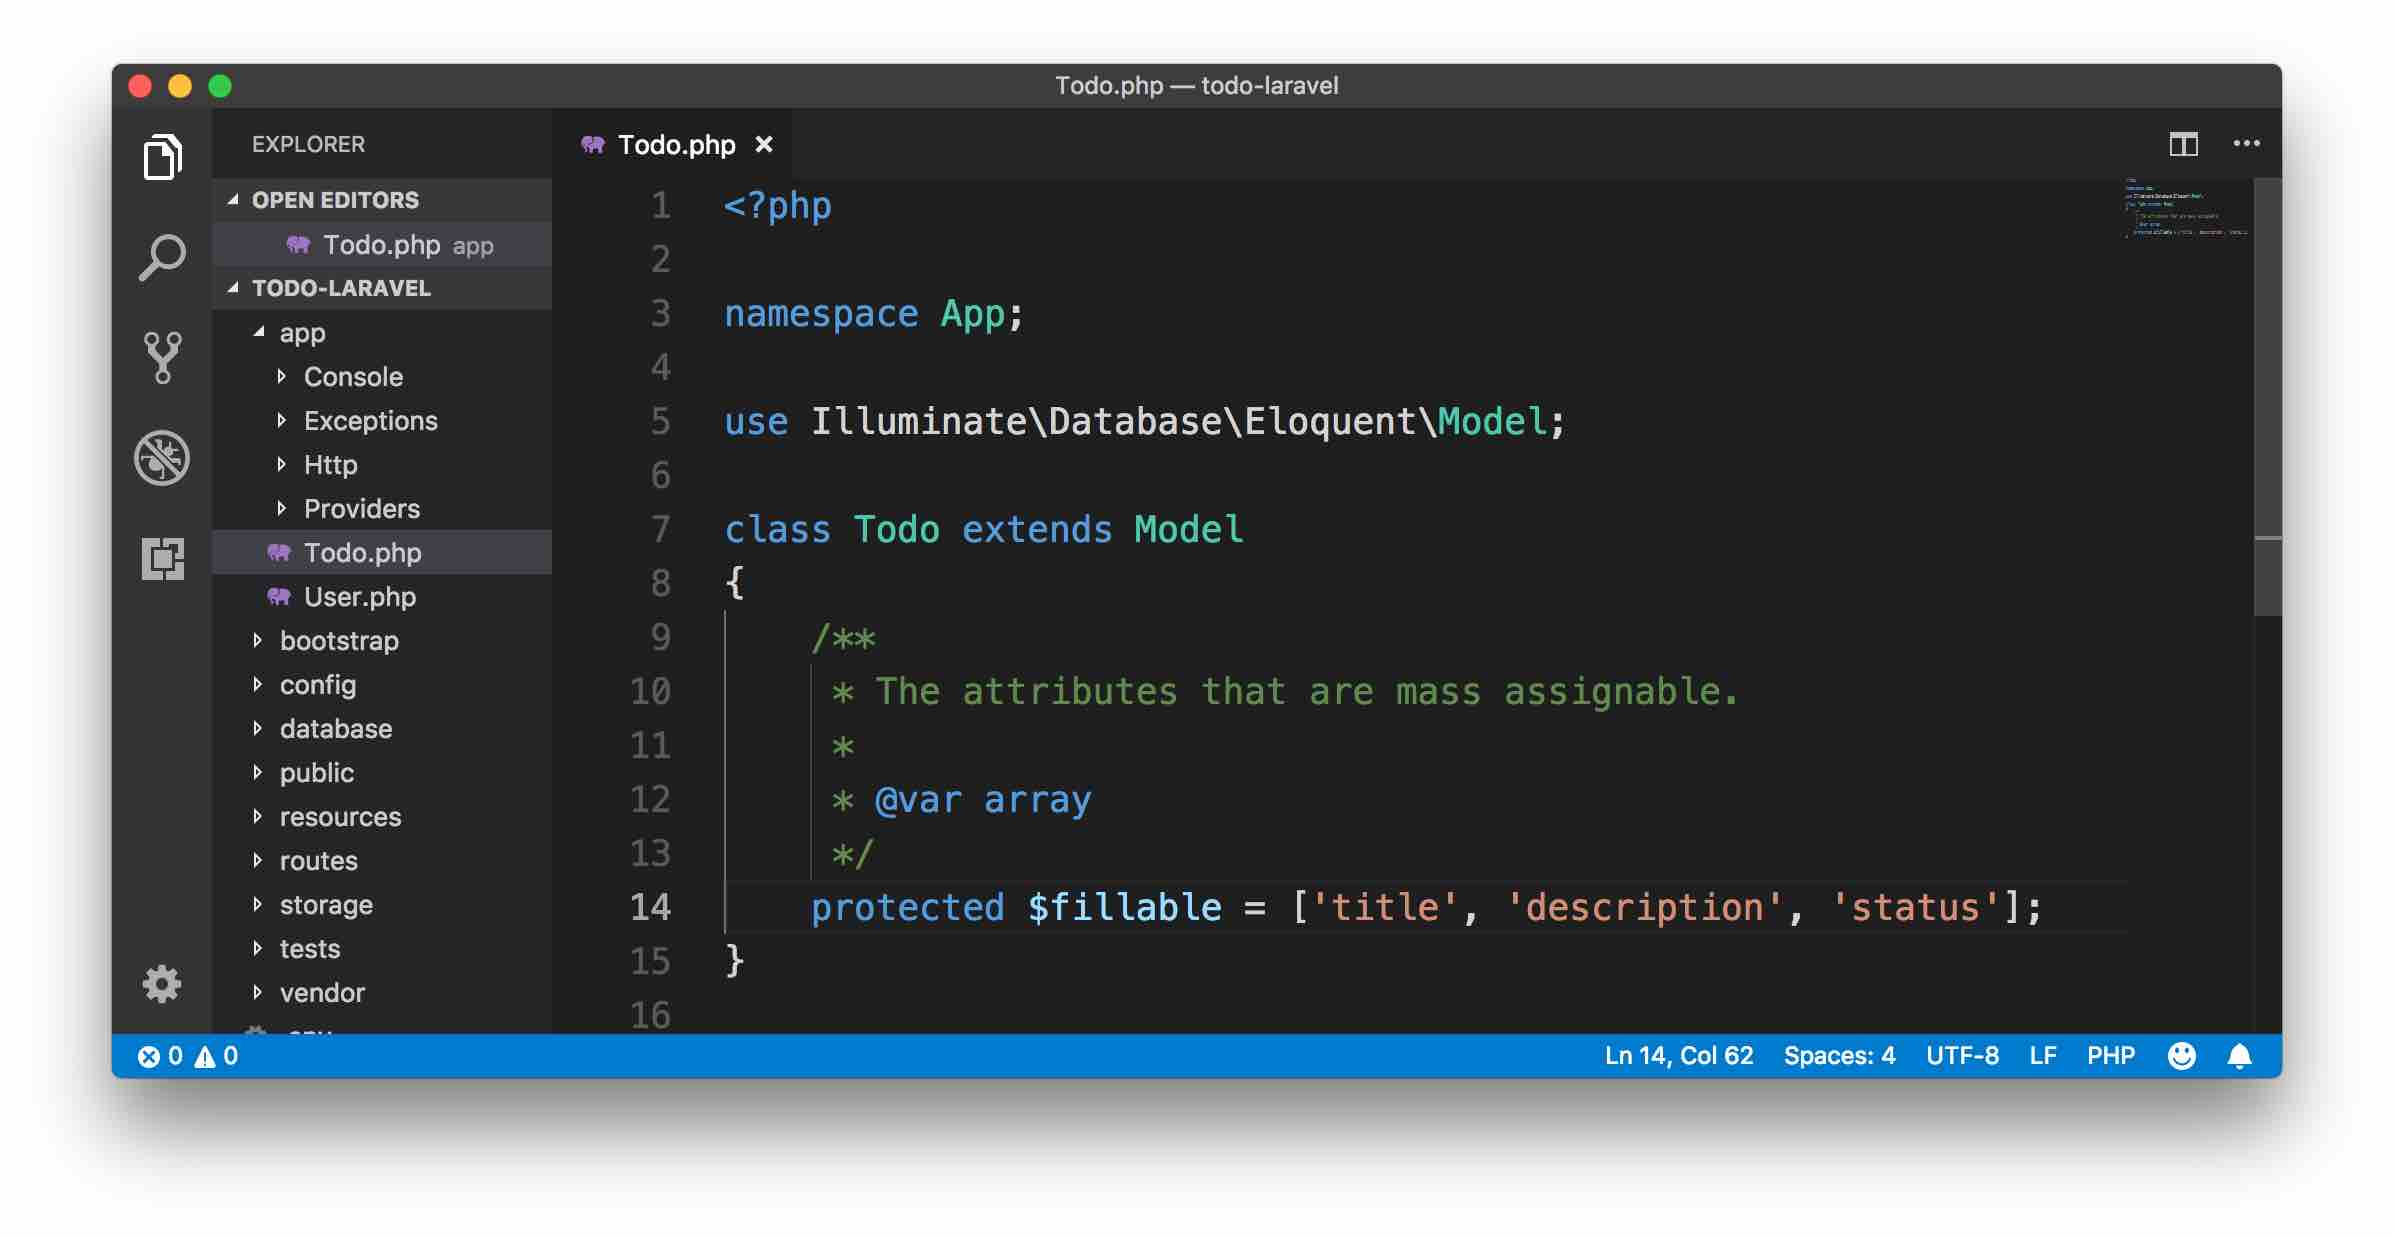
To make 'title', 'description' and 'status' columns of the todos table as mass assignable we have to create a new property $fillable inside the Todo.php model file.
Open app/Todo.php file and add the $fillable property.
protected $fillable = ['title', 'description', 'status'];
Insert data again
Exit Tinker using exit command and then re-enter into Tinker using php artisan tinker.
Now, create an object of the Todo model.
>>> use App\Todo;
>>> $todo = new Todo(['title' => 'first work', 'description' => 'some work to be done']);
=> App\Todo {#2862
     title: "first work",
     description: "some work to be done",
   }
We can see in the above output that we have successfully created a new object. Now we will save the data into the todos table.
Run the following command in the terminal to insert the data into the table.
>>> $todo->save();
=> true
Now if we run the Todo::all(); command in the terminal we will get the first todo task.
>>> Todo::all();
=> Illuminate\Database\Eloquent\Collection {#2850
     all: [
       App\Todo {#2849
         id: 1,
         title: "first work",
         description: "some work to be done",
         status: "ACTIVE",
         created_at: "2018-06-20 09:30:51",
         updated_at: "2018-06-20 09:30:51",
       },
     ],
   }
Insert two more
We can run the following command to insert two more tasks into the todos table.
>>> $todo2 = new Todo(['title' => 'second work', 'description' => 'some more work']);
=> App\Todo {#2864
     title: "second work",
     description: "some more work",
   }
>>> $todo2->save();
=> true

>>> $todo3 = new Todo(['title' => 'third work', 'description' => 'some more work again']);
=> App\Todo {#2860
     title: "third work",
     description: "some more work again",
   }
>>> $todo3->save();
=> true
If we now fetch all the entries we will get back 3 todo tasks.
>>> Todo::all();
=> Illuminate\Database\Eloquent\Collection {#2863
     all: [
       App\Todo {#2852
         id: 1,
         title: "first work",
         description: "some work to be done",
         status: "ACTIVE",
         created_at: "2018-06-20 09:30:51",
         updated_at: "2018-06-20 09:30:51",
       },
       App\Todo {#2849
         id: 2,
         title: "second work",
         description: "some more work",
         status: "ACTIVE",
         created_at: "2018-06-20 09:35:46",
         updated_at: "2018-06-20 09:35:46",
       },
       App\Todo {#2865
         id: 3,
         title: "third work",
         description: "some more work again",
         status: "ACTIVE",
         created_at: "2018-06-20 09:36:17",
         updated_at: "2018-06-20 09:36:17",
       },
     ],
   }
Fetching a specific record
To fetch lets say only the todo task having id 1 we have to run the following command.
>>> Todo::find(1);
=> App\Todo {#2856
     id: 1,
     title: "first work",
     description: "some work to be done",
     status: "ACTIVE",
     created_at: "2018-06-20 09:30:51",
     updated_at: "2018-06-20 09:30:51",
   }
We can also use the where clause to filter the result.
In the following example we are fetching todo task having id 2.
>>> Todo::where('id', '=', 2)->get();
=> Illuminate\Database\Eloquent\Collection {#2853
     all: [
       App\Todo {#2873
         id: 2,
         title: "second work",
         description: "some more work",
         status: "ACTIVE",
         created_at: "2018-06-20 09:35:46",
         updated_at: "2018-06-20 09:35:46",
       },
     ],
   }
Update record
Lets say we want to get the todo task having id 2 and we want to change the status from 'ACTIVE' to 'DONE'. For that we can run the following command.
>>> Todo::find(2)->update(['status' => 'DONE']);
=> true
If we now fetch the task we will see the updated status.
>>> Todo::find(2);
=> App\Todo {#2880
     id: 2,
     title: "second work",
     description: "some more work",
     status: "DONE",
     created_at: "2018-06-20 09:35:46",
     updated_at: "2018-06-20 10:05:24",
   }
Delete record
Now, lets say we want to delete the task having id 3 from the todos table. For that we have to run the following command.
>>> Todo::find(3)->delete();
=> true
If we now list all the records we will get only two tasks.
>>> Todo::all();
=> Illuminate\Database\Eloquent\Collection {#2875
     all: [
       App\Todo {#2879
         id: 1,
         title: "first work",
         description: "some work to be done",
         status: "ACTIVE",
         created_at: "2018-06-20 09:30:51",
         updated_at: "2018-06-20 09:30:51",
       },
       App\Todo {#2865
         id: 2,
         title: "second work",
         description: "some more work",
         status: "DONE",
         created_at: "2018-06-20 09:35:46",
         updated_at: "2018-06-20 10:05:24",
       },
     ],
   }
Awesome! We have learned how to perform CRUD (Create Read Update Delete) operations using Tinker.
In the next tutorial we will learn about Routes.
See you in the next tutorial. And please share this tutorial if you find it helpful :)
ADVERTISEMENT